NetSuite tips – are you getting the most out of the NetSuite iPhone App?

Our NetSuite tips are designed to help you get the most out of using NetSuite. This month’s guide is all about the NetSuite iPhone App. Here, we explain how to set the app up, how to configure it and how to find and use its key features.

NetSuite for iPhone overview

Free to use for all NetSuite customers, the NetSuite iPhone app provides access to your key business information so you can easily monitor business activities anytime from anywhere.
The app is primarily designed for use on the iPhone, but will work on any iOS device with Apple iOS 7.x or higher that has an internet connection.

Key features:

  • View your NetSuite dashboard including KPIs, scorecard, trend graphs, report snapshots, recent records, and reminders.
  • View calendar activities, accept or decline events, and mark tasks as complete.
  • Search for, view and edit records including contacts, customers, employees, cases, issues, leads, opportunities, prospects, estimates, and sales orders.
  • Manage expenses and attach copies of receipts whilst on business trips.
  • Log and manage your time effectively and instantly in and out of the office.
  • Automatically track your outbound phone calls, and streamline your activity logging.
  • Work remotely, place calls, send emails, find locations using Google Maps, and open web pages from within the NetSuite iPhone app.

Features with limited support:

  • VSOE – You can access and edit records that have NetSuite’s Vendor-Specific Objective Evidence (VSOE) feature enabled, but you will not be able to view or edit the VSOE specific fields in those records.
  • Advanced Inventory Management – You can access and edit records that have the feature enabled, but you will not be able to view or edit the Advanced Inventory Management specific fields in those records.
  • Advanced Bin Management – You can access and edit records that have the feature enabled, but you will not be able to view or edit the Advanced Bin Management specific fields in those records.

Supported roles

All standard roles, including Employee and Advanced Partner Centre, are supported and enabled by default. Customised roles and the System Administrator role will need the Mobile Device Access permission adding.
If you are the Administrator and you require mobile access for the Administrator or Full Access roles, you can add the Mobile Device Access permission to yourself as a user.
Administrators can add/remove access for individual roles as required.

Supported record types

NetSuite for iPhone supports all of the following record types:
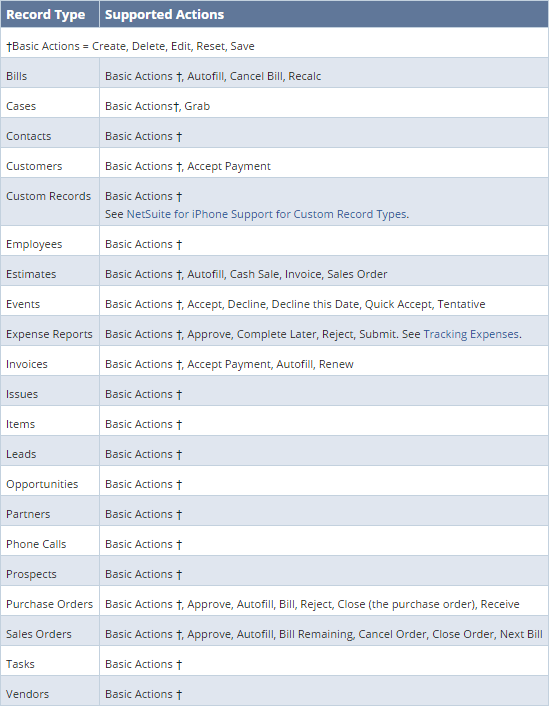
NetSuite_for_iPhone_supported_record_types

In addition NetSuite for iPhone provides limited support for the following record types:
NetSuite_for_iPhone_limited_supported_record_types
The app also provides complete access to custom records including support for view, edit, create and delete (for any custom records already accessible via the NetSuite web application).
You can also access Saved Searches based on custom records, and search for custom records using the Global Search feature.

How to download NetSuite for iPhone

If you are installing NetSuite for iPhone for the first time, follow these simple steps:

  • Go to the App Store
  • Search for NetSuite for iPhone
  • Review the license agreement
  • Tap ‘Free on the iPhone’, or click ‘Free App in iTunes’, and install the application
  • Enter your iTunes Store account and password, if requested
  • If you download NetSuite for iPhone using iTunes on your Mac or PC, then you must sync your device with iTunes before you can use the application.

Once you have downloaded and installed the app, no further setup is required. Most standard roles will be able to access NetSuite without further configuration.

Updating NetSuite for iPhone

The App Store automatically notifies you when an update for this application is available; however, if you already have a version of NetSuite for iPhone installed, you can check for updates by taking the following steps:
From your device:

  • Open the App Store app and tap ‘Updates’. If updates are available, tap ‘Update All’
  • When prompted, enter your iTunes Store account information. The App Store will then download and install all app updates

From your computer:

  • Open the iTunes application
  • Click ‘Apps’ in the left sidebar. (If the sidebar is not visible then select ‘Show Sidebar’ from the ‘View’ menu.)
  • Click the ‘Updates’ tab at the top of the window. The ‘Update All Apps’ button should appear in the bottom right
  • Click ‘Update All Apps’. If prompted, enter your iTunes Store account information. iTunes will then download all app updates
  • Synchronise your device/iPhone with iTunes

Configuring NetSuite for iPhone

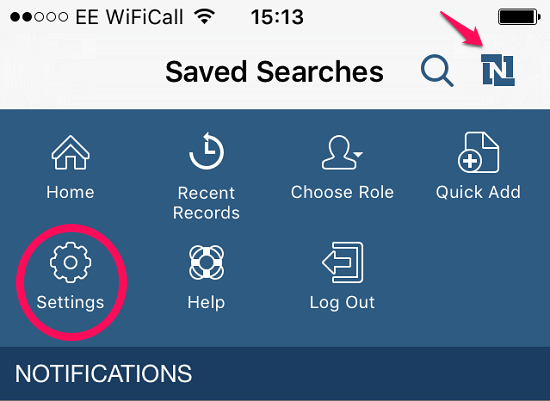
  • Saving or removing your login details – The app can store your login details using the ‘Remember Me’ feature. To enable this, go to Settings:

NetSuite_for_iPhone_settings
Then tap ‘Remember Me’, enter your log in credentials, tap ‘Enable’, and read & agree to NetSuite’s legal statement (if you do agree!) To remove your login details, simply go back into the same Settings and tap ‘Disable’.

  • Setting the time zone – The time zone setting for your NetSuite iPhone app is taken from your NetSuite account, so calendar dates, schedules etc. will be displayed in that time zone. The app ignores the time zone settings of your phone; however, the time zone setting of your NetSuite account can be configured from your mobile device. SImply go to Settings, tap ‘Time Zone’. adjust your settings and tap ‘Done’.
  • Setting date, time and number formatting – Date, time and number formatting for your NetSuite iPhone app are taken from your NetSuite account. You need to log in to the NetSuite web application to change these settings.
  • Setting language – The language settings for your NetSuite iPhone app are taken from your NetSuite account. You need to log in to the NetSuite web application to change these settings.
  • Configuring phone call logging – Phone call logging allows you to track all phone calls initiated from your NetSuite iPhone app (this feature is switched off by default). It can also remind you to log your last call – as soon as a call has ended, a popup alert reminds you to log the call. To adjust these settings, go to your settings and tap ‘Phone Call Logging’. Once you’ve finished, tap ‘Done’.

NetSuite_for_iphone_phone_call_logging

  • Configuring the navigation tab bar – You can configure the Navigation Tab Bar to display any 4 options from the following: Home, Calendar, Saved Searches, and the list of supported record types. On the Tab Bar, tap ‘More’, then on the Menu Bar, tap ‘Reorder’, you can now move record types up or down the list by dragging the grab icon,. When you’re finished, tap ‘Done’. The first 4 items will be displayed in the Navigation Tab Bar (situated at the bottom of most screens).
  • Arranging the Home dashboard – The portlets in the app display synchronised data, so they will show the same information that you see in your NetSuite web application. However, changes to the portlets on your iPhone will not affect the portlets on your NetSuite web application dashboard. To rearrange the home dashboard portlets, from the Home Dashboard, tap ‘ReOrder’ on the Menu Bar, press and drag the grab icon to move a panel to where you want it to be, then tap ‘Done’.
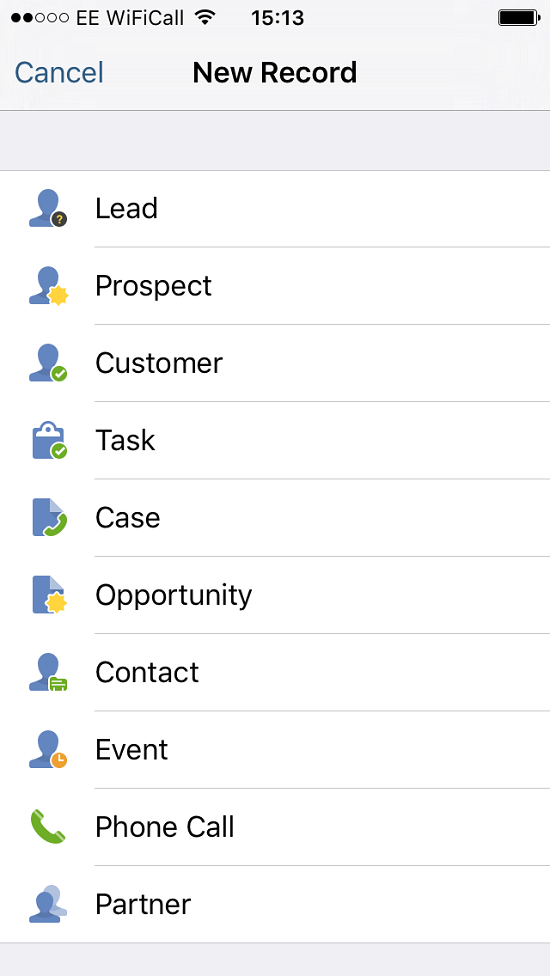
  • Configuring Quick Add – Quick Add allows you to quickly add a new record for a selected number of standard record types. The list of available record types is defined in your NetSuite web application, and may look like the following:

NetSuite_for_iPhone_quick_add_list_of_records
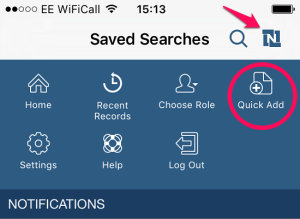
To ‘Quick Add’ a record, tap the ‘Global Actions’ button, tap the ‘Quick Add’ button, and select the required record type.
NetSuite_for_iPhone_quick_add
If your configured Quick Add form does not provide all the details you require, tap the ‘More Details’ button:
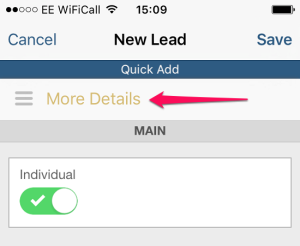
NetSuite_for_iPhone_more_details_for_quick_add
Refresh the list view if the newly added record is not immediately visible.

8 tips for using NetSuite for iPhone

Here are a few tips for using the app that you may not be aware of:
1. When using the app, you can drag down on any inactive part of the screen to refresh the displayed data.
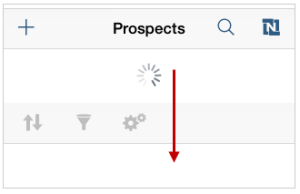
NetSuite_for_iPhone_refresh_screen
2. When you’re viewing a list of records or events in portrait mode, you can swipe across a record to reveal ‘Quick Actions’ such as edit, complete, call, email, etc. The actions available for a specific record depend on the record type and its state.
NetSuite_for_iPhone_swipe_across_for_quick_actions
3. When viewing a saved search, you can tap a column header to order the records by the selected column. Tap the same column header again to invert the ordering.
4. You can add new records quickly and easily in a selected number of standard record types using ‘Quick Add’. (See section above for how to do this.)
5. You can easily access recently viewed or edited records. The list of recent records is synchronised with your NetSuite web application, so any records viewed on your iPhone will also be listed on your web application and vice versa. Tap the Global Actions button, tap the ‘Recent Records’ icon, and select the required record.
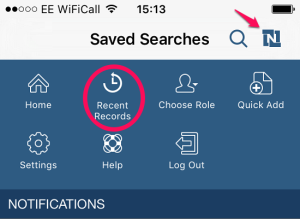
NetSuite_for_iPhone_recent_records
6. From the ‘My Expenses’ portlet you can create a new Expense Report and attach expense receipts directly from your iPhone.
7. You can record billable time and post time entries directly to NetSuite using the ‘Enter Time’ feature. These entries are then posted to the Timesheets page in NetSuite. (This feature must be enabled in your NetSuite account by your administrator.)
8. There are three ways to access your saved searches. Firstly, they are accessible directly from your Home Dashboard by tapping the ‘View List’ button on the Saved Searches portlet. Secondly, you can access them via the Navigation Tab Bar. On the Tab Bar, tap ‘More’, then tap Saved Searches. Scroll down the list to locate the required Saved Search. Alternatively, you can use the Global Search to find them.

Security features

NetSuite for iPhone utilises the following features to enhance the security of your data while using a mobile device.

  • Mobile Device Access Permission – Administrators can control who has mobile access to their NetSuite accounts by enabling/disabling the Mobile Device Access permission for each role. This enables administrators to control mobile access on a role by role basis.
  • Data Security – NetSuite for iPhone does not store any unencrypted NetSuite data on your mobile device. The app stores a limited amount of encrypted NetSuite data locally on your iPhone.
  • Security Questions – Whenever you log in to NetSuite using a different device/browser you are required to provide a second form of authentication in addition to your password. The first time you log in using your iPhone you will be asked one of your three security questions.
  • Two-Factor Authentication – The app supports two-factor Authentication (2FA) using RSA tokens. When logging into a 2FA role designated as ‘RSA token authentication required’, first enter your credentials and tap ‘Log in’. On the separate 2FA screen, enter your token code and tap ‘Authorize’. RSA tokens are either generated from a SecurID fob or from a soft token generated by the RSA SecurID Software Token app. You can download this app from the App Store.
  • IP Address Filtering – Any settings for IP address filtering on your NetSuite account will also apply to accessing NetSuite via the iPhone app. It is advised that you do not have this feature enabled for any roles you use with your mobile device.

I hope this has been helpful and provided you with a useful insight into the NetSuite iPhone App. If you would like to find out more about how NetSuite works, please don’t hesitate to get in touch with our team of experts or view our other ‘NetSuite tips’ guides below.
Feel free to share this guide with your colleagues.

Keep reading

Choosing the Right ERP Software: Key Factors to Consider

Once you’ve made the decision to move on from spreadsheet accounting or to upgrade your legacy ERP system, how do you choose the right ERP software?

Oracle NetSuite vs. Microsoft Business Central: Which is the juiciest ERP?

When you manage your whole business through an ERP system, you’re able to get a bird’s-eye view of your business, and better understand company-wide impacts of decisions, plans and unforeseen changes. This coordinated view is a real boon for companies looking to grow and to increase efficiency.

Realising Cost Savings: Calculating the ROI of Moving to NetSuite

It’s essential to quantify the value and expected returns from implementing a new ERP system like NetSuite. After all, any new IT system is a substantial business expense, requiring a compelling business case to gain buy-in from stakeholders.

Exploring the Benefits of Cloud-based ERP Solutions for Growing Businesses

As businesses strive for efficiency, they are increasingly turning away from on-premises technology and moving to the cloud. As testament to this shifting trend, statistics indicate that cloud ERP is forecast to grow at more than 17% between 2022 and 2028.

Streamline Your Operations: Solving Inventory Challenges with a New ERP System

ERP systems help companies automate and streamline operations, but how can they tackle the problems posed by inventory management?

How to manage a new NetSuite Release: one expert's update process

When you manage your whole business through an ERP system, you’re able to get a bird’s-eye view of your business, and better understand company-wide impacts of decisions, plans and unforeseen changes. This coordinated view is a real boon for companies looking to grow and to increase efficiency.

Ready to transform your business with Oracle NetSuite or Microsoft Dynamics 365?

Get in touch with us, and we promise we wont waste your time.

  • Initial call back to hear your needs.
  • We’ll give you an outline price fast.
  • A full discovery session to get to the heart of your business.
  • We’ll arrange software demos to show you what we can do.