Our NetSuite tips are designed to help you get the most out of using NetSuite. This month’s guide is all about the NetSuite iPhone App. Here, we explain how to set the app up, how to configure it and how to find and use its key features.
Free to use for all NetSuite customers, the NetSuite iPhone app provides access to your key business information so you can easily monitor business activities anytime from anywhere.
The app is primarily designed for use on the iPhone, but will work on any iOS device with Apple iOS 7.x or higher that has an internet connection.
All standard roles, including Employee and Advanced Partner Centre, are supported and enabled by default. Customised roles and the System Administrator role will need the Mobile Device Access permission adding.
If you are the Administrator and you require mobile access for the Administrator or Full Access roles, you can add the Mobile Device Access permission to yourself as a user.
Administrators can add/remove access for individual roles as required.
NetSuite for iPhone supports all of the following record types:
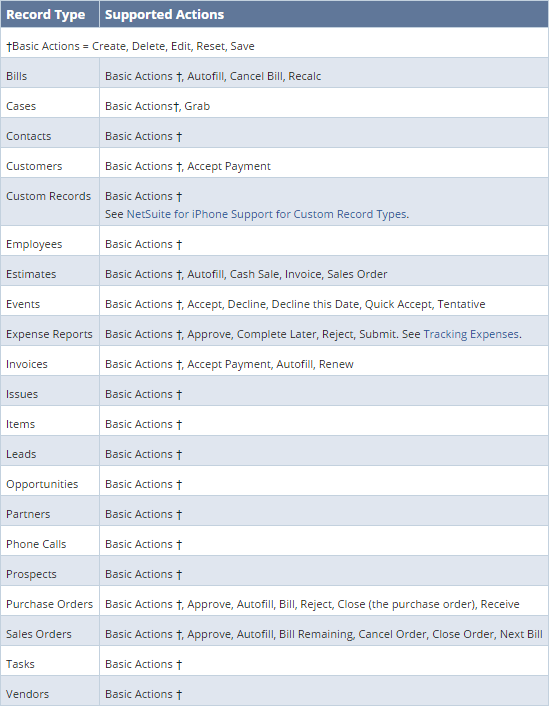
In addition NetSuite for iPhone provides limited support for the following record types:
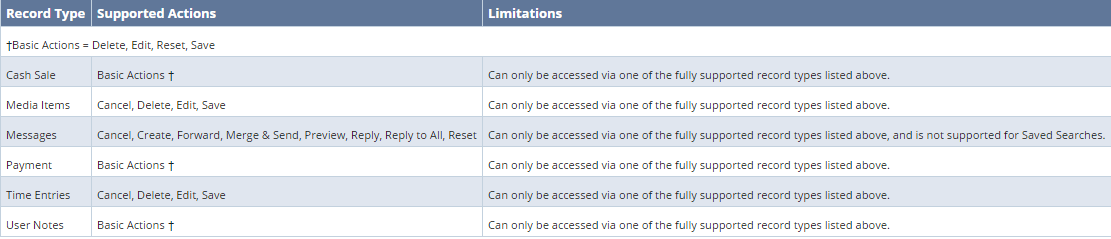
The app also provides complete access to custom records including support for view, edit, create and delete (for any custom records already accessible via the NetSuite web application).
You can also access Saved Searches based on custom records, and search for custom records using the Global Search feature.
If you are installing NetSuite for iPhone for the first time, follow these simple steps:
Once you have downloaded and installed the app, no further setup is required. Most standard roles will be able to access NetSuite without further configuration.
The App Store automatically notifies you when an update for this application is available; however, if you already have a version of NetSuite for iPhone installed, you can check for updates by taking the following steps:
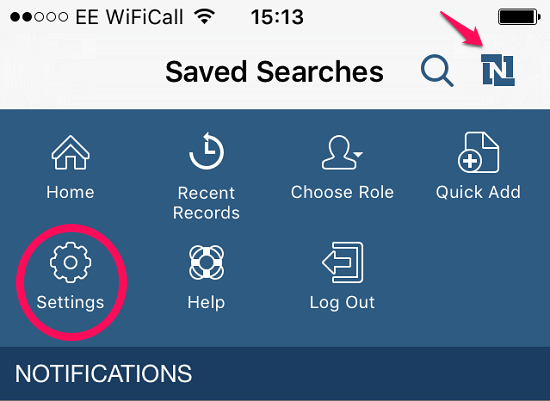
Then tap ‘Remember Me’, enter your log in credentials, tap ‘Enable’, and read & agree to NetSuite’s legal statement (if you do agree!) To remove your login details, simply go back into the same Settings and tap ‘Disable’.

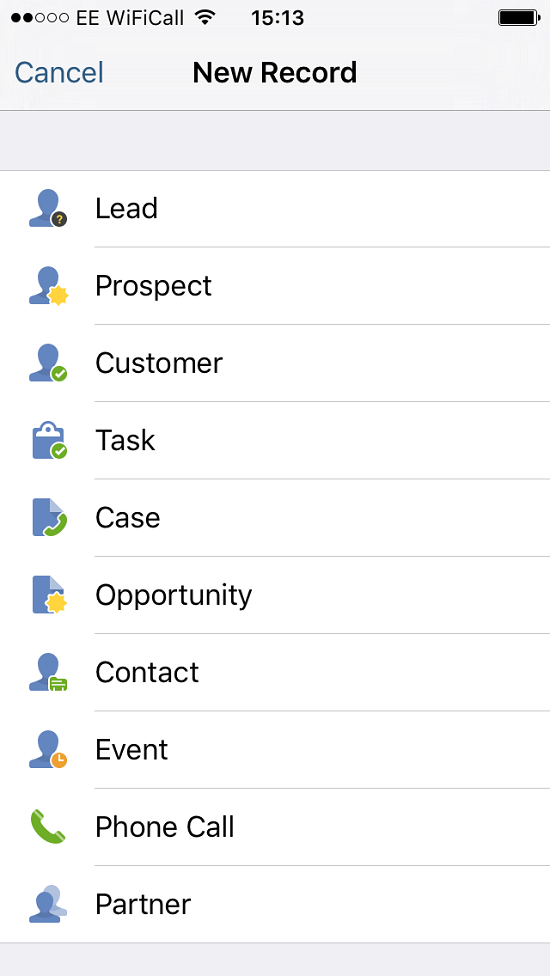
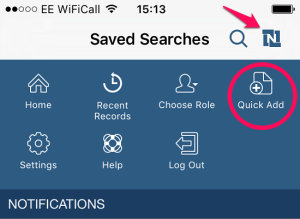
To ‘Quick Add’ a record, tap the ‘Global Actions’ button, tap the ‘Quick Add’ button, and select the required record type.
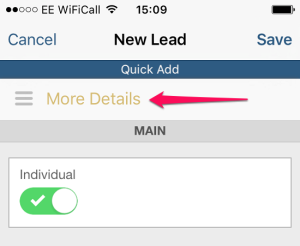
If your configured Quick Add form does not provide all the details you require, tap the ‘More Details’ button:
Refresh the list view if the newly added record is not immediately visible.
Here are a few tips for using the app that you may not be aware of:
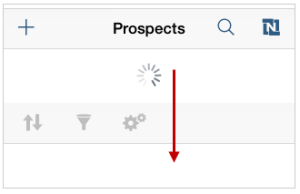
1. When using the app, you can drag down on any inactive part of the screen to refresh the displayed data.
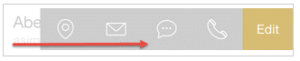
2. When you’re viewing a list of records or events in portrait mode, you can swipe across a record to reveal ‘Quick Actions’ such as edit, complete, call, email, etc. The actions available for a specific record depend on the record type and its state.
3. When viewing a saved search, you can tap a column header to order the records by the selected column. Tap the same column header again to invert the ordering.
4. You can add new records quickly and easily in a selected number of standard record types using ‘Quick Add’. (See section above for how to do this.)
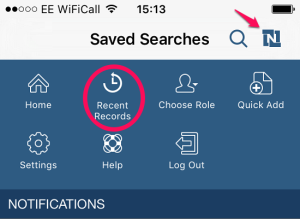
5. You can easily access recently viewed or edited records. The list of recent records is synchronised with your NetSuite web application, so any records viewed on your iPhone will also be listed on your web application and vice versa. Tap the Global Actions button, tap the ‘Recent Records’ icon, and select the required record.
6. From the ‘My Expenses’ portlet you can create a new Expense Report and attach expense receipts directly from your iPhone.
7. You can record billable time and post time entries directly to NetSuite using the ‘Enter Time’ feature. These entries are then posted to the Timesheets page in NetSuite. (This feature must be enabled in your NetSuite account by your administrator.)
8. There are three ways to access your saved searches. Firstly, they are accessible directly from your Home Dashboard by tapping the ‘View List’ button on the Saved Searches portlet. Secondly, you can access them via the Navigation Tab Bar. On the Tab Bar, tap ‘More’, then tap Saved Searches. Scroll down the list to locate the required Saved Search. Alternatively, you can use the Global Search to find them.
NetSuite for iPhone utilises the following features to enhance the security of your data while using a mobile device.
I hope this has been helpful and provided you with a useful insight into the NetSuite iPhone App. If you would like to find out more about how NetSuite works, please don’t hesitate to get in touch with our team of experts or view our other ‘NetSuite tips’ guides below.
Feel free to share this guide with your colleagues.
NoBlue2 acquires Viridian to expand its EPM and Office of the CFO offering.
NetSuite 2026.2 lands with more AI woven through the platform. Kyler Hofton, our Head of Support, walks through the four areas worth your attention: passkeys as a 2FA authenticator, audit trails and automation in bank reconciliation, AI-assisted inventory optimisation, and cleaner field service notes.
Over 43,000 businesses worldwide currently trust NetSuite to be their ERP solution. And as award-winning NetSuite partners, we know exactly why they do. In this post, we'll set out 5 reasons why your retail business should choose NetSuite over any other ERP to help make your business as efficient (and profitable) as possible.
As experts in NetSuite implementation and the benefits it brings, we're perfectly placed to explain how the system scales with businesses, and how it can support your growth - which we do right here, so read on!
Want to save time and effort on the Dunning process by automating it through NetSuite? Read our guide to find out how.
Nowadays, businesses accrue increasing amounts of data – whether they’re growing or not. The challenge is collecting and using that data wisely.

